Clipping References and Blocks
In practice, there are situations when you need to work only on a part of a Reference (a Referenced drawing file) or a Block. Instead of displaying the entire Reference, you can clip it to an area defined by a boundary and display only the part that you want to work on.
Use the ClipReference command to clip a Reference or a Block to an area defined by a specified boundary. The command hides all entities outside the specified boundary.
Example:
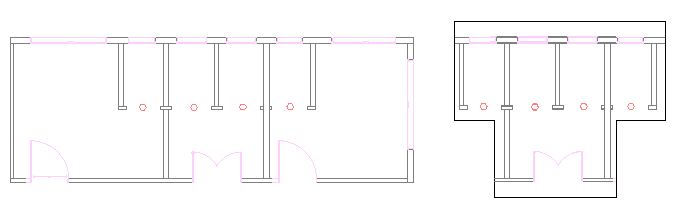
You can create one clipping boundary per Reference or Block. The clipping boundary can be a polyline, a rectangle, or a polygon.
The command creates a link between the Reference and the clipping boundary. Moving the clipping boundary moves the Reference also. Copying or rotating the clipped reference takes into account the boundary as well.
When you no longer need the clipping boundary, you can delete it. Deleting the clipping boundary does not delete the Reference.
Options of the command let you do the following:
- Dynamically change the boundary
- Invert the area to be hidden
- Hide or display the boundary
- Specify a clipping depth to when using the command with 3D entities
If you select a Reference and the ribbon is active, the Reference contextual tab appears. The contextual tab groups frequently used options and tools for working with References.
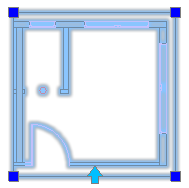
Resizing Clipping Boundaries
Additionally, you can change the shape or the size of the clipping boundary using grip points. A special grip point on the frame lets you invert the frame.
Note: Changing the boundary does not modify the entities in the Referenced drawing file.
Grip points available on the clipping boundary:
| Grip Point | Icon | Modifications |
|---|---|---|
| Standard |  |
Stretch, Resize |
| Invert |  |
Inverts the area to be hidden |
Example:
To clip References or Blocks:
- Specify the References or Blocks to which you want to apply a clipping boundary, and press Enter.
- Click Modify > Clip > Reference (or type ClipReference).
- Do one of the following:
- On the menu, click Modify > Clip > Reference.
- On the ribbon, click Insert > Reference > Manage References > Clip.
- Type ClipReference.
- Specify an option:
- Boundary: Creates a new clipping boundary. If a clipping boundary already exists for the Reference or Block, you are prompted to delete the old boundary. Specify options:
- Invert clip: Lets you invert the display of the clipping boundary. Use the option to display the entities outside the boundary or to return to the previous mode.
- Polygonal: Lets you define an irregular polygonal shape as a clipping boundary by specifying points.
- Rectangular: Lets you define a rectangular clipping boundary around the area to keep by specifying two opposite points.
- Select polyline: Lets you select an existing PolyLine to serve as a clipping boundary. Arc segments are decurved.
- Clip depth (used for 3D clipped References or Blocks): Sets the front and back planes parallel to the clipping boundary. You select the planes by specifying clip points. Use inferencing to select geometry. Specify options:
- Distance: Uses specified distances from the clipping boundary to create the front and back planes.
- Remove: Removes the clipping planes.
- Delete: Removes the clipping boundary.
- Off: Turns the clipping boundary off to display the Reference or Block entirely. The clipping boundary is retained so you can activate it again.
- On: Turns the clipping boundary on to display only the portion of the Reference or Block inside the clipping boundary.
- Polyline: Creates a PolyLine from the clipping boundary you created before (using the Rectangle and Polygonal options).
- Boundary: Creates a new clipping boundary. If a clipping boundary already exists for the Reference or Block, you are prompted to delete the old boundary. Specify options:
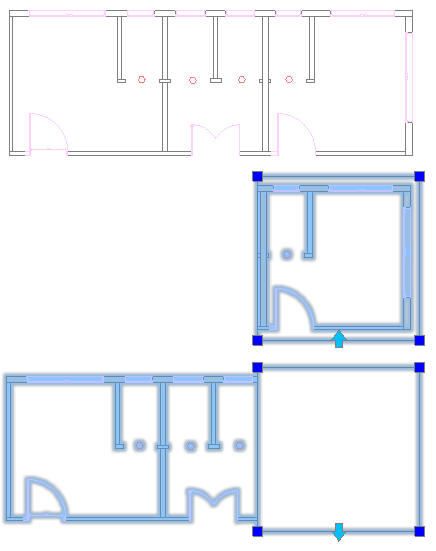
To invert a clipped Reference:
- Click the clipping boundary to invert to display the grip points.
- Click the grip point at the midpoint of the first edge of the boundary.
Example:
Access
Command: ClipReference
Menu: Modify > Clip > Reference
Ribbon: Insert > Reference > Clip > Reference
Contextual Ribbon: Reference > Clip